Raycon Essential Headphones
Raycon Essential Headphones
Essential Headphones
User Manual
What's in the Box
📦 A carrying case is not included with the Essential Headphones. The headphones fold flat for easy packing in a bag or backpack.
Unit at a Glance
💡 All buttons (ANC/EQ, Volume, Power) are on the left earcup. The right earcup contains the Bluetooth LED only.
Button Controls
The Essential Headphones use three physical buttons on the left earcup. Unlike touch-control earbuds, these are tactile press buttons — each has a distinct feel to help you find the right one without looking.
Power Button
| Function | Action |
|---|---|
| Power On | PowerHold 1.5 sec |
| Power Off | PowerHold 3 sec |
| Play / Pause | PowerPress once |
| Answer Call | PowerPress once |
| End Call | PowerPress once |
| Reject Call (incoming) | PowerHold 1 sec |
Volume Down Button
| Function | Action |
|---|---|
| Volume Down | Vol –Press once |
| Previous Track | Vol –Hold 1 sec |
Volume Up Button
| Function | Action |
|---|---|
| Volume Up | Vol +Press once |
| Skip Track | Vol +Hold 1 sec |
| Voice Command | Vol – + Vol +Hold both 1 sec |
⚠️ The Volume Up and Volume Down buttons are adjacent — pressing the wrong one skips a track instead of adjusting volume. Run your finger to the top or bottom edge of the earcup to locate each button by feel before pressing.
Sound Profiles & ANC
The ANC/EQ Button on the left earcup controls both your sound profile (EQ) and noise control mode — two separate functions on one button.
EQ / Sound Profiles — Hold 2 Seconds to Cycle
Balanced Sound
An even sound across all frequencies — great for podcasts, calls, and all-around listening.
Bass Sound
Bass-boosted profile for music with strong beats. Ideal for workouts or bass-heavy genres.
Pure Sound
The most neutral, detailed profile — designed to hear every instrument and vocal clearly.
Noise Control Mode — Tap Once to Cycle
Active Noise Cancellation
Blocks out continuous background noise — engines, HVAC, open-plan offices. Best for focus and travel. Battery: ~48 hours.
Awareness Mode
Amplifies ambient sound so you can hear your surroundings — announcements, conversations — without removing the headphones.
Passive noise isolation only — the ear cup seal reduces outside sound naturally. Extends battery to ~50 hours.
💡 ANC works best on consistent low-frequency noise (airplane engines, traffic, HVAC). It won't fully silence voices or sudden sharp sounds — that's normal for all ANC headphones.
Charging
Plug In
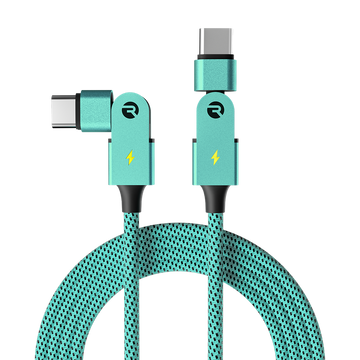
Connect the USB-C cable to the charging port on the left earcup. Use the included cable or any USB-C cable rated at 5V/1A or higher.
Charging Indicator
The charging LED (below the USB-C port, left earcup) glows solid red while charging. It turns solid blue when fully charged.
Full Charge
A complete charge takes approximately 2 hours. The LED will turn blue — unplug and go.
Wired Listening
The 3.5mm aux cable lets you listen with no battery required. Plug into the left earcup aux port and your device's headphone jack.
⚠️ The headphones cannot play audio while charging via USB-C. For uninterrupted listening during a charge, switch to the included 3.5mm aux cable.
Battery Life at a Glance
LED Status Guide
The Essential Headphones have two LEDs — one on each earcup. Left side tracks charging; right side tracks Bluetooth connection.
| LED | Location | Meaning |
|---|---|---|
| Charging LED — Left Earcup | ||
| Solid Red | Left earcup | Headphones are charging |
| Solid Blue | Left earcup | Fully charged — ready to use |
| Bluetooth LED — Right Earcup | ||
| Alternating Blue / Red | Right earcup | In Pairing Mode — searching for a device |
| Solid Blue | Right earcup | Connected to a device |
| Blinking Red | Right earcup | Battery is low — charge soon |
Connecting via Bluetooth
Power On & Enter Pairing Mode
Hold the Power button for 1.5 seconds. The headphones turn on and automatically enter pairing mode — you'll see the right earcup LED alternating blue and red.
Select on Your Device
On your phone, tablet, or laptop, open Bluetooth settings and select "Raycon Essential Headphones". The right LED turns solid blue when connected.
💡 Previously paired devices reconnect automatically when you power on the headphones. To manually re-enter pairing mode, hold the Power button during startup until you hear the pairing prompt — or hold ANC/EQ + Volume Down simultaneously for 5 seconds to reset the connection.
Using the 3.5mm Aux Cable
For wired listening — no Bluetooth, no battery needed — plug the included 3.5mm cable into the port on the left earcup and into your device's headphone jack. The headphones will pass audio through regardless of power state.
⚠️ If the aux port stops working, check that the cable is fully seated (push until it clicks) and try a different cable to rule out a cable fault before contacting support.
Multipoint
Multipoint lets you connect to two devices at the same time — your phone and laptop, for example — and automatically routes audio to whichever device is playing. Both devices must be within Bluetooth range (33 ft / 10 m).
Pair with your first device
Disconnect from first device via Bluetooth settings
Pair with your second device
Headphones now connect to both automatically on startup
Troubleshooting & FAQ
Answers to the most common issues reported by our customers — resolved before you need to contact support.
Headphones won't power on
- The Power button requires a firm 1.5-second hold — a quick press won't power them on.
- Check the battery: connect the USB-C cable and look for a solid red charging LED on the left earcup. If no LED appears, try a different cable or power adapter.
- If the battery is deeply depleted, charge for at least 15–20 minutes before attempting to power on.
I accidentally skipped a track when trying to adjust volume Common
- The Volume Up and Volume Down buttons are close together on the left earcup. A short press adjusts volume; a 1-second hold skips or replays a track — it's easy to hold too long.
- Tip: use a quick, deliberate press (under half a second) to adjust volume. If you feel the buttons click, you've pressed firmly enough — release promptly.
- Locate the buttons by feel before pressing: Volume Down is toward the front of the earcup, Volume Up is directly above it.
Microphone sounds garbled, muffled, or cuts out on calls Common
- Move closer to your connected device — staying within 10 ft (3 m) during calls significantly improves mic quality.
- In noisy environments, ANC mode can sometimes cause mic feedback. Try switching to Awareness Mode or ANC Off during calls.
- Check that the call app (Teams, Zoom, Google Meet) has the input set to "Raycon Essential Headphones" and not your device's built-in mic.
- Toggle the headphones off and back on to clear temporary audio processing issues.
- Ensure nothing is covering or obstructing the microphone ports on the earcup.
Ears get hot during long listening sessions Common
- Over-ear headphones naturally retain some heat from the ear cup seal — this is normal and affects all closed-back designs.
- For extended sessions (2+ hours), taking a 5–10 minute break every hour significantly reduces heat buildup.
- The ear cushions are removable and washable (see Cleaning below) — clean cushions retain heat less than cushions with skin oil buildup.
- If ear heat is a persistent concern, the open-ear Essential Open Earbuds (O15) don't seal over the ear and may be a more comfortable all-day option.
ANC doesn't seem to block much noise
- ANC works best on continuous, low-frequency noise — airplane engines, HVAC systems, traffic hum, and open-office ambient sound. It is not designed to silence voices or sharp/intermittent sounds.
- Ensure the ear cups are seated fully over your ears with a good seal — a poor seal reduces ANC effectiveness significantly.
- Glasses wearers: the frame arm can break the ear cup seal. Try adjusting the headband tension or repositioning the cups slightly.
- To confirm ANC is active, press the ANC/EQ button once — you should hear a tone and see the ANC LED change state.
Headphones will not charge
- Use the included USB-C cable and a wall adapter (5V/1A or higher). USB ports on computers and power strips can provide insufficient current.
- Try a different USB-C cable — cable faults are a common cause of charging failure.
- Inspect the USB-C port on the left earcup for debris and clear gently with a dry toothpick if needed.
- A solid red LED on the left earcup confirms charging has started. No LED = no power reaching the headphones.
Audio cuts out or no sound via Bluetooth
- Ensure you're within 33 ft (10 m) of your connected device. Walls and interference from other wireless devices reduce the effective range.
- Check battery level — a low battery on the headphones or the connected device weakens the Bluetooth signal.
- If the audio plays for a few seconds then stops, try forgetting the headphones in your device's Bluetooth settings and re-pairing from scratch.
- If you have another device previously paired, ensure the headphones aren't trying to connect to the wrong one — power cycle to force a fresh connection attempt.
No sound through the 3.5mm aux cable
- Confirm the cable is fully inserted into both the left earcup aux port and your device — push until you feel it seat (some ports require a firm push).
- Check the volume level on both the headphones and the connected device.
- Try a different 3.5mm cable to rule out a cable fault.
- Some newer phones and tablets do not have a 3.5mm headphone jack — you'll need a USB-C to 3.5mm adapter, sold separately.
Headphones feel loose or don't stay on during activity
- Adjust the headband to increase clamping force — extend both sides equally for a balanced fit, then gradually reduce until the headphones sit securely without pressure discomfort.
- For workouts, position the headband slightly further back on the crown of the head for more stability during movement.
- The Essential Headphones are designed primarily for stationary and light-activity use. For running or high-intensity workouts, a sport-specific Raycon model may be a better fit.
Can I listen while the headphones are charging?
- No — USB-C charging disables Bluetooth and audio output while connected. The headphones will not play while plugged in.
- To listen with no battery, plug the included 3.5mm aux cable into the left earcup and your device's headphone jack. This works regardless of battery or charge state.
Cleaning the Ear Cushions
- The ear cushions are removable. Gently pull the cushion away from the earcup to detach before cleaning — do not wash them while attached to the headphones.
- Hand wash with mild soapy water or a damp cloth. Allow to air dry completely before reattaching — do not use a dryer or direct heat.
- Avoid harsh chemicals, alcohol wipes, or bleach — these degrade the PU leather coating over time.
- Do not allow moisture into the earcup speaker housing. Clean the plastic housing separately with a dry cloth only.
- Regular cleaning (monthly if worn daily) helps preserve the cushion material and reduces heat buildup.
Resetting your Headphones
- To re-enter pairing mode manually: hold the ANC/EQ button and Volume Down button simultaneously for 5 seconds until the headphones power off and the LED begins alternating blue and red.
- Then power on normally — the headphones will be in fresh pairing mode, disconnected from all previous devices.
- Delete "Raycon Essential Headphones" from your device's Bluetooth list before re-pairing for the cleanest reconnection.
Product Specifications
Safety & Warranty
Safety Guidelines
- Be wary of edges, uneven surfaces, and metal parts on accessories and packaging.
- Listen at safe volumes — prolonged exposure to high volumes can damage your hearing.
- Do not store in high temperatures such as a hot vehicle or in direct sunlight.
- Do not expose the headphones or accessories to rain or other liquids for extended periods.
- Do not drop or subject the headphones to heavy impact — the headband and earcup joints are vulnerable to hard falls.
- Do not modify, repair, or dismantle the product yourself.
- Do not use any solvent or volatile liquid to clean the product.
- Do not use the product in hazardous locations.
Limited Warranty
Your Essential Headphones are covered by a limited warranty. Visit rayconglobal.com/warranty for full details.
Support
If your device is not functioning properly, visit rayconglobal.com/support or email support@rayconglobal.com.
Compliance & Regulatory
FCC Warning: This device complies with Part 15 of the FCC Rules. Operation is subject to the following two conditions: (1) This device may not cause harmful interference, and (2) this device must accept any interference received, including interference that may cause undesired operation. Any changes or modifications not expressly approved by the party responsible for compliance could void the user's authority to operate the device.
This equipment has been tested and found to comply with the limits for a Class B digital device, pursuant to Part 15 of the FCC Rules. The device has been evaluated to meet general RF exposure requirements and can be used in portable exposure conditions without restriction.
ISED Canada: This device contains licence-exempt transmitter(s)/receiver(s) that comply with Innovation, Science and Economic Development Canada's licence-exempt RSS(s). This device may not cause interference and must accept any interference, including interference that may cause undesired operation. This equipment complies with Canada radiation exposure limits set forth for an uncontrolled environment.