Raycon Everyday Headphones - 26e-0726 - Full User Manual
Raycon Everyday Headphones - 26e-0726 - Full User Manual

The Everyday Headphones
An audio companion as strong as you are. Everything you need to set up, wear, and get the most out of your headphones, plus fixes for the things people ask about most.
What's in the Box
The headphones ship without a case. If you want protection for travel, the Everyday Bag for Headphones and replacement ear cushions are sold separately at rayconglobal.com.
Unit at a Glance
Functions & Button Control
Power Button
| Function | Action |
|---|---|
| Power On | Hold 1.5 seconds |
| Power Off | Hold 3 seconds |
| Play / Pause | Press once |
| Answer Call | Press once |
| End Call | Press once |
| Reject Call (while ringing) | Hold 1 second |
Volume Buttons
| Function | Action |
|---|---|
| Volume Down | Press Volume Down once |
| Previous Track | Hold Volume Down 1 second |
| Volume Up | Press Volume Up once |
| Skip Track | Hold Volume Up 1 second |
| Voice Command | Hold Volume Down + Volume Up together 1 second |
Like most headphones, pushing to 100% volume, especially with Bass EQ, can cause the drivers to distort or rattle. Backing the volume off a step or two usually clears it and keeps the sound clean.
Sound Profiles, ANC & Awareness
EQ Profiles - hold the ANC / EQ button 1.5 seconds to cycle
| Profile | Best for |
|---|---|
| Balanced Sound | Leveled, warm sound that is great all-around |
| Bass Sound | Boosted low end for songs with strong beats |
| Pure Sound | Our most refined sound, perfect clarity to hear every note |
ANC & Awareness Mode - tap the ANC / EQ button to toggle
Active Noise Cancellation (ANC): blocks out unwanted background noise for uninterrupted focus. Awareness Mode: amplifies the sounds around you so you can stay connected to your surroundings.
Over-ear ANC depends on a full seal around your ears. Make sure the cushions completely enclose each ear (not resting on top of them) and that the headband is adjusted so they sit snug. A weak seal is the most common reason ANC feels underwhelming. ANC works best on steady, low-frequency noise and won't fully remove voices or sudden sounds.
Charging Your Headphones
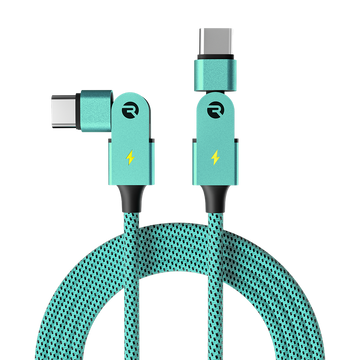
Plug the USB-C connector into the charging port on the left side of the headphones, using the included cable and a wall adapter where possible.
The charging LED above the port glows solid red while charging.
When the LED turns solid blue, the headphones are fully charged. A full charge takes about 1.5 hours.
Battery Life
Charge fully before first use. Actual battery life varies with volume, EQ profile, and ANC use.
The headphones will not play over Bluetooth while plugged in and charging. If your battery is low and you want to keep listening, use the 3.5mm auxiliary cable for wired playback instead.
Charge with the provided USB-C cable and a reliable power source (a wall charger is preferred). If the headphones will not charge, try a different USB-C cable, port, and adapter, and make sure the port is clear of lint.
LED Status Guide
Charging LED (left side)
| Indicator | Meaning |
|---|---|
| Solid Red | Headphones are charging |
| Solid Blue | Headphones are fully charged |
Connection LED (right side)
| Indicator | Meaning |
|---|---|
| Alternating Blue & Red | Pairing mode |
| Solid Blue | Connected to a device |
| Blinking Red | Battery is low |
Comfort & Fit
A good fit is the difference between weak, leaky sound and full audio with strong noise cancellation. Take a moment to set them up for your head.
Slide the headband arms in or out so the ear cushions sit centered over your ears, with the band resting lightly on the top of your head.
Make sure each cushion fully surrounds your ear rather than pressing on top of it. A complete seal is what gives you the bass and the noise cancellation.
The fit should feel secure without pinching. For long sessions, take short breaks to stay comfortable.
If the headphones slip or feel loose, extend the headband a notch or two so the cushions grip around the ear rather than sitting low. If they feel tight or sore near the cheekbones after a while, loosen the band slightly and reposition the cushions. The PU-leather ear cushions are removable and replaceable, so you can swap in fresh ones from rayconglobal.com as they wear.
Pairing Your Headphones
Hold the power button for about 3 seconds to power on. The headphones enter pairing mode automatically, with the connection LED flashing alternating blue and red.
On your device, open Bluetooth settings, make sure Bluetooth is on, and select "Raycon Everyday Headphones" to pair.
To re-enter pairing mode later, press and hold the power button during startup until you hear the prompt, or hold the ANC button and Volume Down together for 5 seconds to power down and disconnect from all devices.
Wired Listening (3.5mm Aux)
Prefer a cabled connection, or out of battery? Plug the included 3.5mm auxiliary cable into the aux input on the headphones and into your device's headphone jack for wired audio. If you get no sound over the aux cable, check the volume on both the device and the headphones and confirm the cable is fully seated at both ends.
Connect to Two Devices at Once
Multipoint lets you stay connected to two devices at the same time, like your phone and laptop, and switch automatically to whichever one is playing audio. Both must be within Bluetooth range with Bluetooth on.
Pair the headphones with your first device (e.g. your phone).
Disconnect the headphones from that first device in its Bluetooth settings. The headphones re-enter pairing mode.
Pair the headphones with your second device (e.g. your laptop).
The headphones will now connect to both devices whenever they are turned on.
Troubleshooting & FAQ
They feel too big, slip off, or don't fit my head Most Common
- Adjust the headband arms: slide them in for a smaller head so the cushions grip around your ears instead of sitting low.
- Position each cushion so it fully surrounds the ear; this also improves the seal, bass, and noise cancellation.
- If they still slip, wearing them slightly forward can help the band sit more securely on the crown of your head.
ANC feels weak or "there's no noise cancellation" Most Common
- Seal is everything on over-ear ANC: make sure the cushions completely enclose your ears and the band is snug.
- Confirm you are in ANC mode, not Awareness Mode - tap the ANC / EQ button to toggle between them.
- ANC targets steady, low-frequency noise (engines, HVAC, cabins). It won't fully silence voices or sudden sounds.
- Long hair or glasses arms under the cushion break the seal - tuck them clear for the best result.
Audio cuts out, crackles, buzzes, or disconnects Common
- Stay within 10 meters (33 ft) of your device and keep line of sight where possible.
- Make sure both the headphones and your device are charged; a low battery on either side weakens the connection.
- Forget "Raycon Everyday Headphones" on your device, then power the headphones off and on and re-pair.
- Move away from Wi-Fi routers, microwaves, and other 2.4GHz sources, which cause crackle and dropouts.
Headphones won't power on
- Charge them first - plug in the USB-C cable and confirm the charging LED glows red.
- Let them charge for a while, then hold the power button for 1.5 seconds to turn on.
Headphones will not charge
- Use the provided USB-C cable; a damaged or data-only cable can prevent charging.
- Use a sufficient power source - a wall charger is preferred over a laptop or hub port.
- Check the USB-C port for lint or debris and clear it gently, then try a different outlet.
No sound over Bluetooth
- Stay within 10 meters (33 ft) of the connected device.
- Check the battery level on both the headphones and your device; low battery can weaken or drop the link.
- Turn the headphones off and on, or forget them on your device and re-pair.
No sound through the 3.5mm aux cable
- Check the volume on the device, the music source, and the headphones.
- Make sure the aux cable is intact and fully seated at both ends.
One side is quiet, rattles, or something is loose inside
- Try a different EQ profile and lower the volume a step to rule out distortion.
- Reseat the ear cushion; a loose cushion can rattle or muffle one side.
- If one side has genuinely stopped working or something is loose inside the cup, that's a hardware issue - contact support for warranty help.
A button is stuck or unresponsive
- Press buttons firmly and squarely rather than at an angle, and keep the edges free of debris.
- If a button stays stuck or stops responding, contact support - a failed button is covered under warranty.
Multipoint isn't working
- Confirm the headphones are charged and disconnected from any Bluetooth device.
- Put them in pairing mode and reconnect each device following the Multipoint steps above.
How do I clean the ear cushions?
- Remove the cushions from the headphones before cleaning - do not clean them while attached.
- PU-leather cushions: hand wash only with soapy water or a damp cloth, and avoid harsh chemicals.
- Do not let moisture get inside the earcups. Replacement cushions are available at rayconglobal.com.
Product Specifications
Safety & Warranty
Safety Guidelines
- Be wary of any edges, uneven surfaces, and metal parts, including on accessories and packaging, to prevent injury or damage.
- Listen at a proper volume to protect your hearing and your headphones.
- Do not store in high temperatures, such as a hot vehicle or direct sunlight.
- Do not expose the headphones or supplied parts to rain or other liquids for extended periods.
- Do not drop or cause undue impact to the headphones.
- Do not modify, repair, or dismantle the product on your own.
- Do not use any diluent or volatile liquid to clean the product.
- Do not use the product in a hazardous location.
Support
If your device isn't working properly, visit rayconglobal.com/support and our team will be glad to help.
Limited Warranty
Your Raycon Everyday Headphones are covered by a limited warranty. Visit rayconglobal.com/warranty for details.
Compliance & Regulatory
FCC Warning: This device complies with Part 15 of the FCC Rules. Operation is subject to the following two conditions: (1) this device may not cause harmful interference, and (2) this device must accept any interference received, including interference that may cause undesired operation. Any changes or modifications not expressly approved by the party responsible for compliance could void the user's authority to operate the device.
NOTE: This equipment has been tested and found to comply with the limits for a Class B digital device, pursuant to Part 15 of the FCC Rules. These limits are designed to provide reasonable protection against harmful interference in a residential installation. This equipment generates, uses, and can radiate radio frequency energy and, if not installed and used in accordance with the instructions, may cause harmful interference to radio communications. However, there is no guarantee that interference will not occur in a particular installation. If this equipment does cause harmful interference to radio or television reception, which can be determined by turning the equipment off and on, the user is encouraged to try to correct the interference by reorienting or relocating the receiving antenna, increasing the separation between the equipment and receiver, connecting the equipment into an outlet on a circuit different from that to which the receiver is connected, or consulting the dealer or an experienced radio/TV technician for help.
ISED Canada: This device contains licence-exempt transmitter(s)/receiver(s) that comply with Innovation, Science and Economic Development Canada's licence-exempt RSS(s). Operation is subject to the following two conditions: (1) this device may not cause interference, and (2) this device must accept any interference, including interference that may cause undesired operation of the device.
RF Exposure: This equipment complies with Canada radiation exposure limits set forth for an uncontrolled environment and has been evaluated to meet general RF exposure requirements. It can be used in portable exposure conditions without restriction.